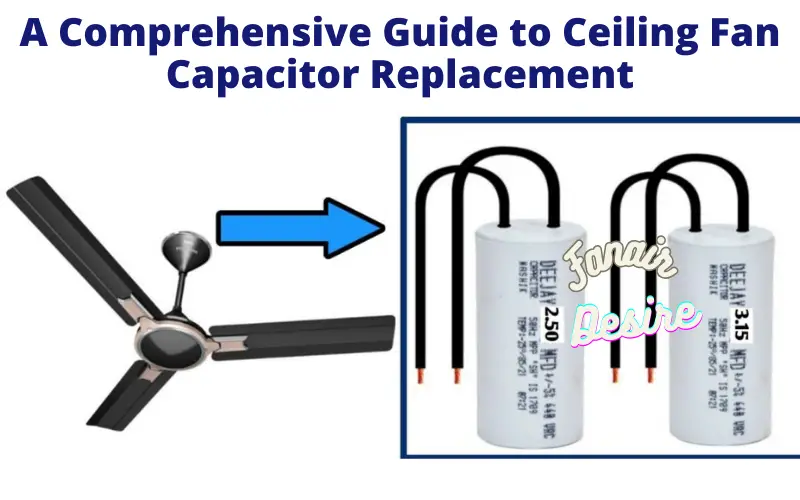
Ceiling fans are the unsung heroes of comfort in our homes, silently circulating air, keeping us cool in summer, and distributing warmth in winter. But, like all things mechanical, they’re not immune to wear and tear. If you’ve noticed your ceiling fan behaving erratically, it might be time to investigate the capacitor—a small yet critical component that controls the fan’s speed.
In this comprehensive guide, we’ll delve into the world of ceiling fan capacitor replacement, equipping you with the knowledge and confidence to tackle this task effectively and ensure your trusty fan remains a reliable ally in maintaining your comfort.
Reviving the Breeze: A Comprehensive Guide to Ceiling Fan Capacitor Replacement
Understanding the Capacitor
Before we embark on the replacement journey, let’s demystify the role of the capacitor. In a ceiling fan, the capacitor serves as the conductor of the orchestra, determining the fan’s speed.
This small but essential component stores electrical energy and releases it to initiate the fan motor and regulate its speed.
Over time, capacitors can succumb to wear and tear, leading to a host of issues such as the fan failing to start, running at inconsistent speeds, or emitting unusual noises.
Recognizing the Signs for Ceiling Fan Capacitor Replacement
The first step in knowing when it’s time for a ceiling fan capacitor replacement is recognizing the signs of a failing capacitor. These include:
Inconsistent Speeds:
If your fan struggles to maintain a consistent speed or switches between speeds erratically, a failing capacitor could be the culprit. So here is the need for ceiling fan capacitor replacement.
Failure to Start:
When you flip the switch, and your fan remains motionless, a malfunctioning capacitor might be to blame.
Unusual Noises:
Capacitor issues can manifest as strange noises during fan operation, including humming, clicking, or rattling.
Intermittent Operation:
If your fan starts but abruptly stops without reason, it’s time to investigate the capacitor.
Gathering the Essentials
Before we dive into the replacement process, gather the following materials:
- Replacement Capacitor: Ensure you purchase a capacitor that matches the specifications of your fan. Refer to your fan’s manual or inspect the existing capacitor for details.
- Screwdriver Set: You’ll need a set of screwdrivers to access the fan housing.
- Voltage Tester: Safety is paramount. Use a voltage tester to confirm there’s no electrical charge in the fan before you proceed.
- Wire Nuts and Electrical Tape: These are essential for securely connecting wires.
Step-by-Step Guide to Ceiling Fan Capacitor Replacement
Step 1: Cut the Power
Safety should always be your priority. Begin by turning off the power to the ceiling fan. This can be achieved by either switching off the circuit breaker or removing the fuse. Use your trusty voltage tester to ensure that there’s no electricity coursing through the fan’s wiring.
Step 2: Disassemble the Blades
Access the inner workings of your fan by removing the blades. Most fans have a cover or cap that conceals the motor housing and blades. Remove any screws or fasteners securing this cover and gently take off the blades.
Step 3: Locate the Capacitor
Now that you’ve exposed the fan’s motor housing, you should be able to spot the capacitor. It typically appears as a cylindrical or box-like component with wires connected to it.
Take note of the wiring connections and snap a quick picture or create a diagram to facilitate reassembly later.
Step 4: Disconnect the Wires: Ceiling Fan Capacitor Replacement
Using wire nuts, carefully disconnect the wires connected to the capacitor. It’s crucial to remember which wire corresponds to which terminal to ensure a seamless reconnection process.
To prevent accidental contact with live electrical components, securely tape the disconnected wires.
Step 5: Remove the Old Capacitor
Unscrew or unclip the old capacitor from its mounting. Exercise caution to avoid damaging surrounding components or wires in the process.
Step 6: Install the New Capacitor
Attach the new capacitor in the same position as the old one. Ensure it’s securely fastened, and the wires can comfortably reach their respective terminals.
Step 7: Reconnect the Wiring: Ceiling Fan Capacitor Replacement
Reconnect the wires to the new capacitor following the diagram or image you took earlier. Utilize wire nuts and electrical tape to secure the connections firmly in place.
Step 8: Reassemble the Fan
Return the fan blades to their rightful place and secure them with the previously removed fasteners. Double-check that everything is correctly aligned and tightened.
Step 9: Restore the Power
Turn the power back on at the circuit breaker or fuse box.
Step 10: Test the Fan: Ceiling Fan Capacitor Replacement
Finally, switch on the fan and test it at different speeds to confirm that the new capacitor is operating flawlessly. Listen closely for any unusual noises or signs of inconsistent speed.
The Bottom Line
Ceiling fan capacitor replacement may seem like an intricate task, but armed with the right tools and a systematic approach, it transforms into a manageable DIY project.
Prioritize safety by disconnecting the power before commencing work and employing a voltage tester. With your freshly replaced capacitor, you’re poised to enjoy the renewed comfort and enhanced performance of your ceiling fan for many seasons to come.

